White Sourdough Bread
I have tried many sourdough recipes, either with bread flour or whole wheat flour. Both types of flours come out great. I always use King Arthur’s 14% wheat protein flour or Indian roti flour, to build my starter. Most recipes are time consuming and require folding every 30 minutes. The recipe below has only 3 folds, one every hour.
Temperature: Temperature has a significant impact in building a starter and making bread. At higher the temperatures fermentation is faster and lower the temperature it is slower. I keep 75F during the daytime and at night I reduce to 73F. At this temperature, the starter grows at a controlled pace.
How to prepare the starter from scratch:
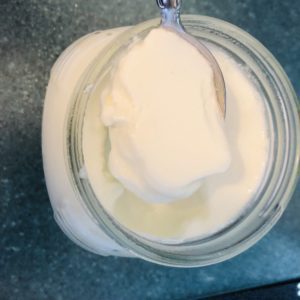
There are innumerable recipes of how to begin building your starter from scratch. The process is the same in all recipes and only differs in the amount of flour and kind of flour used. The quickest rise comes from rye flour as the process is much faster, but the King Arthurs’s whole wheat flour with 14% protein is also good (you can always mix both to control rise speed). Always use clear glass jar and filtered warm water.
1) Most starters start with 100g flour and 100gm of water. As during the process of building the starter you throw half the starter.
In my case to economize flour I start with only 10 gm of flour:10 gm of water . mix well with spatula and transfer into a small (200 ml) glass jar, mark the mixture the height with rubber band. Keep mixture at room temperature for 24 or 48 hours and until it shows some activity like small bubbles.
2) After it shows some activity add in a flour/water mixture using the ratio of 1:1:1 (10g starter/10g flour/10g water) to renew the starter (discard and remaining starter).
3) Continue the process every 24 hours until it doubles in volume. It may take 7to 15 days depending on the temperature conditions and the type of flour used.
4) After the starter starts doubling in volume a few times, renew the starter every 12 hours to build the strength. You will know it is ready for use and strong when it triples in volume within 12 hours and it passes the flit test
5) Flot test: take a small quantity of starter and drop into a glass of cold water. If it floats the starter is very strong and ready to make a bread. If it doesn’t float continue the renewing process until it floats.
How to preserve the starter:
Once the starter is ready I switch to all-purpose flour. After renewing it keep at room temperature for a few hours and when it begins to rise refrigerate it. If making the bread every week, remove the starter from the refrigerator 2 days before, renew it 3 to 4times before preparing levain. In case you are travelling for extended periods or making-bread sporadically keep it refrigerated. I have stored the starter for more than 2 months in the refrigerator. It is normal under these circumstances for it to become extremely sour and produce a black liquid called shoot. Always pour out the shoot. To reduce the sourness feed it with all-purpose flour in the ratio of 1:10:10 (starter: flour: water) for a few days prior to using.
How to slow starter growth:
If I want to slow down the growth process to time it with my timing, to prepare levain, I put my starter in the refrigerator after it has doubled and take it out 2 hours or more prior to use to condition at the room temperature and finish rising. This process is important because you do not want your starter to collapse. When it starts collapsing you see it deflating and leaving behind a ring from where it started collapsing. Even if it begins to collapse, it is still good to use. Just do a quick float test to check.
Making the bread:
I prepare the levain around 11 pm for it to be ready for bread making after 7am next morning. If your starter is doubling too early (before 11pm) refrigerate it for 2hours and then remove it from the refrigerator 2 hours before to get to room temperature and finish rising by 11pm. Make a float test thereafter. If you prefer to make it all the same day, prepare the levain very early morning and when it triples in volume proceed to prepare the bread.
Levain for 500g bread
80g King Arthurs’s bread flour
20g King Arthur’s whole wheat flour.
30g Sourdough starter.
100g water.
Mix above ingredients well at night or in the morning, transfer into approximately 800 ml jar and mark the top of the mixture with a rubber band (or use a sharpie). Make a float test before proceeding to prepare the bread. If the levain doesn’t float leave for some more time to rise.
500g Bread Ingredients:
500g bread flour
350g warm water
167g leavain
10g salt
Next day record your start time.
8:00am: Mix levain with water until it’s completely dissolved. Add flour to the mixture, mix very well incorporating all dry flour, cover it with plastic wrap or airtight cover. Rest for 1 hour.
9:00am (1st fold): Wet fingers and shake off excess of water. Start folding the dough, keep folding for 1 minute. If needed wet fingers frequently. (Please see video, jyotirecipes on Instagram or Facebook)
10:00am (2nd fold): Repeat same process as before.
11:00am (3rd fold): Repeat same process as before.
After the 3rd fold, let dough rest for 1 to 11/2 hs+ hours, depending on temperature condition. When the dough has doubled in volume it is ready to shape.
Prior to shaping, Keep ready the proofing basket by dusting flour into it using tea strainer or your hands. If you do not have proofing basket, use a colander covered with a well-floured cloth. Make sure to flour it generously.
Shaping the dough:
1) Sprinkle flour on a clean kitchen counter surface.
2) Carefully transfer the dough onto the counter. Flour hands and pat the dough into round shape like pizza. be carful not to burst the bubbles.
3) Fold the ends towards the center overlapping each fold.
4) Start shaping into firm ball, rolling with two hands towards you then on right and left and again towards you and back. Repeat till you feel a firm smooth ball.
5) Transfer into shaping basket, with the bottom part of the ball on top. Close any cracks by pinching the dough.
6) Put the proofing basket with dough in a plastic bag, tie the bag and leave one hour or more (depending on ambient temperature) on the counter.
7) Open the bag to check if the dough has risen. After it has risen leave in the refrigerator or freezer for an hour, it makes scoring and transferring the dough into Dutch oven easy. (I have made it without refrigerating and the bread came out as good as refrigerating).
Oven: Preheat the oven at 485F or 250C with Dutch oven inside. Pizza stone can also be used, in that case check if the oven has built in steamer, start it as soon as you transfer the bread on pizza stone. If there isn’t steamer in the oven use a tray with 4 to 6 cups of water, place it under the bread rack 15 minutes before transferring the bread, to create steam. Before the Oven has preheated cut the parchment paper bigger than the diameter of Dutch oven or the size of pizza stone. Keep 2 racks ready to place hot lid and Dutch oven on it.
After the oven is preheated remove the bread from the refrigerator, cover it with parchment paper and place a dinner plate on top of parchment paper. Turn the plate upside down with basket, so that the bread dough will be on parchment paper. Carefully remove the basket and score the bread with sharp knife or blade.
Remove the Dutch oven or pizza stone from oven, transfer the dough with parchment paper into the Dutch oven cover it and immediately take back to oven, Same for pizza stone.
Cook for 25 minutes covered, after that time reduce oven temperature to 400F or 200C.
Remove the lid and cook for 10 more minutes.
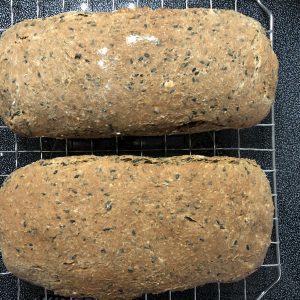
Remove the bread from oven and Dutch oven and place it on rack to cool down.


Rate this recipe
2 People Rated This Recipe
Average Rating
No comments yet.